Thursday, May 31, 2012

Fabric Folding 2 & A Fabric Stash/Ironing Station

As I was posting pictures of different storage ideas I got to thinking about folding fabrics.

I touched base on comic board folds, Cut to Pieces which work great for standard sized fabrics and also ruler folds which is featured on Turning, Turning.  But I still needed folding ideas for my wider fabrics (up to 60") and  I recently came across this beauty from The Craft E Gal, it's a very informative pictorial on folding wider fabrics using an OmniGrid ruler.

I also didn't mention rolling fabric.  How could I have forgotten this one? Lately, I have acquired so many towels that my standard folding isn't working for storage, so I started rolling them, and now I can fit all my towels in my linen closet.  Same goes for fabric.  If your using a shelving unit, rolling the fabric is another good option if folding isn't. (I personally roll all of my knit fabrics)

And while on my search for other fabric folding ideas..... I came across this beauty and had to share...

I found this posted on the St. Louis Modern Quilt Guild...  a fabric storage solution that also ends ALL  standard free standing ironing boards in the room...


How to create the Fabric Storage / Ironing Station:

Materials Needed: 
* Small Wire Shelving Unit ( ranging from 30" - 36" depending on your height & preference)( Home Depot,  WalMart, Target )
* 20x60 piece of 3/4" MDF board OR OSB Subfloor 
* Batting  * Fabric  *Stapler
*S-Hooks & Basket to hang ironing accessories (water spray bottle and starch)

The MDF or OSB boards are NOT attached to the shelving unit, but keeping safety in mind, I'm sure it can be.  ALSO, I have read that MDF DOES warp over time and have read that OSB does not, so that is also something to keep in mind when making this. 

After the MDF/OSB board is cut, wrap and staple the board with batting, then wrap and apply the fabric the same way.  Once wrapped, place the board on the shelving unit, place near an outlet and VOILA!  Your new fabric storage/ironing station! 

I honestly see this in my future! 

Wednesday, May 30, 2012

LISD has a Facebook Group

Don't forget to join the Let It Shine Design (LISD) Facebook Group.

It's a great place to share pictures of your of accomplishments, your experiences of organizing, creating storage solutions and other chit chat.

This is a private group, so membership is required.. and of course it's Free!

Come on over and join in the fun!

See you there!

Tuesday, May 29, 2012

Fabric Folding & Fabric Storage Solutions

After posting accessories for thread and bobbin storage, I got to thinking further about fabric storage.  During the creation of the TOSN, I was originally going to include examples of fabric storage but it overwhelmed me b/c the ways of storage are limitless.  We all have different organizational/storage needs so to try and touch base on all of them seemed daunting and I opted not to include them.  Then some mamas were discussing that adding them to TOSN would be a bonus to TOSN and make it more wholesome.

After debating the idea and talking it over with Will, I have decided that I will sell out of my current listed stock on my Etsy cart, take a few weeks to revamp the whole TOSN and relist it.. chock full of more useful information.  (All previous purchasers will receive the updated version FOC of course!)  I have also had ideas of additional chapters, so this will be the perfect time to complete them as well.

So for now, I'm going to share some of the best fabric storage ideas I have found.  I have searched countless blogs and spent hours getting lost on Pinterest to share fabulous ideas at a glance for you.

Starting with how I store my fabric. I am lucky to have a full double door closet in our shared office room (lovingly called "the room of chaos"). I store ALL of my crafting supplies there and it works perfectly for me.

To store my fabric I bought these at Target on sale for $17 each set of (4) cubes.  I bought (3) sets, but ended up splitting up the 3rd set to help the toy storage in my son's closet.


After years of checking out other people's craft room ideas I found the neatest fabric storage is to use comic boards. The below picture was taken from a blog that shows how neat and clean fabric storage can be.  This is the answer to any OCD organizer's dream! 


Also, over at Smashed Peas and Carrots, she shows more ways to use the comic board storage and how to fold the fabric. 


If your feeling up to making your own boards, here are some dimensions to get you started.  Thanks to Alaskasunshine's Fabric Folding Tutorial over at QuiltingBoard.com
 

On to more fabric storage ideas!

Since we touched base on comic board storage, other's have chosen full bolt storage.  I found this lovely photo on Flickr that was posted by GardenPat.  If you like this idea and don't have full sized fabric bolts handy, go to your local fabric shop, Joann's or Hobby Lobby and ask if you can have the ones they put in the trash.  


This is a fabric addicts dream! Just looking at this shelf makes me want to run my fingers over the fabric.  This blog also has a great tutorial on how to fold the fabric in flat squares by using an Omnigrid Ruler.  Check out Within a Quarter of an Inch


Bunching together a couple 6 shelved wire drawer units provides the ideal storage solution.  I found this great idea on The Little Green Notebook


My heart filled with instant happiness when I saw this picture.  I want this.. I mean.. seriously... how awesome is this?  Not only a pretty piece of furniture, but the color is inspiring, and the dresser is useful for storing fabric and using the top for other forms of storage. It's a double win! This was a find on Flickr posted by Cindy {K}


This is something I covet... I yearn for it... but I simply don't have the space... unless I kick the kids computers out of the office and make it ALL mine... hmmm.. LOL.. It's 4 cubby shelves combined together to create not only fabric storage but a cutting and pattern layout area.  *swoon.  I found this great idea over at: GeorgiaPeachez 


I love the Sterilte clear storage units. I use them for multiple storage uses.  Here is a great pic of how it's used for fabric storage and there is a tutorial on the blog on how to fold the fabric to allow it to fit in the shelves. Thank You Sunla-Designs


Using a letter sorter as fabric storage is clever! I can see myself utilizing this along with my Projects at a Glance Page.  This idea was found over at Design Mom


Fabric canvas storage cubes. To determine color family stored in the cube, place a color example (fabric swatches or paint swatch cards from a hardware store work great for this) in the windowed note section. This picture was taken from the Etsy blog (Everything Etsy.) 


Clear plastic tubs or shoe boxes are a great way to organize fabric as well. Not only do they not take up a great deal of space, it's easy to see the fabric.  I buy my clear shoe boxes at the $ store for a buck!


This was a very interesting idea and I had to share it! This would work perfectly with the Project at a Glance page, she combines all the fabrics, notions and pattern together and hangs it for future reference. I found this and other great pictures over at The Mother Huddle 


This is a fabulous idea to hang pre-ironed fabrics.  5 layered pant hangers. I found this great post on the Etsy blog (Everything Etsy) referring back to a blog called: FilmandThread. 


Behind the door storage! This is such a great idea! For those of you who live in tighter quarters, using the back of the door is perfect! This can be used for fabric or for ribbon (as pictured)


For fabric stashes that are stored in tubs.. here is a pic of a PVC shelving unit.  The tutorial and directions for making the PVC shelving unit can be found at Studio 5.


Now only will you be recycling fabric scraps with this idea, but you will be recycling a piece of musical history.  Using cassette case dividers to store fabric scraps.  This idea is simply music to my ears and can be found at Tonyastaab   


For multiple sized fabric pieces, this make keeping track of them a breeze.  While storing scraps in a basket is easy, I find myself always searching for a certain sized piece and hen having to measure pieces. This takes the guesswork out of finding the size you need.


For quilters who have fat quarter's it's difficult to store them b/c of their size... I found this brilliant idea on a blog and am going to utilize this myself...  for fat quarter storage ideas with a PDF form to create labels, visit Quilting Gallery

If you find other great fabric storage solutions please share!  Some of us could use all the help we can get!  (yes, I'm talking about me.. the self confessed fabric-a-holic).

Thanks for stopping by and Happy Organizing!
=) Kristina

Updated Fabric Swatch & Sewing Thread Pages

I had some feedback regarding the fabric swatch page so I updated it a bit more to make life a bit easier.

I also updated the Sewing Thread page and added "Purchased from" to the information box.

If you haven't received it, shout out and I'll send it your way.

Please keep in mind, I sent the updates to the email you have on file with Etsy, not to your paypal account.

Happy Organizing!

Organize-A-Long Week #2 ..Threads

YEY! You have survived the fabric section!!! 
Now, close your eyes for a moment, inhale deep, exhale slow, open your eyes and then dive into collecting all your threads and bobbins.  It’s time to organize and log your thread & bobbin inventory.  This should be a breeze in comparison to the fabric.  
If you haven’t completed your fabric, that’s okay.. you can continue on your fabric logging journey and catch up with us at your own pace! This is not a race, the organize-a-long is being featured to help people stay on track and to utilize the notebook. We are each other’s cheerleaders and we can commiserate with each other b/c we understand the insanity and obsessive collecting of this craft!
Okay... so here goes: 
Organizing Spools of Thread:
I organize my threads by color, that way when I glance at them I go directly to the color family I want and find the exact color. You can also organize them by color #, but that could be confusing as some thread companies don’t use a specific number as a code for a color family.  
Storage:
For my larger spools such as Maxi-Locks I use under the bed bins, they are narrow (fit the ML spool perfectly) and fit approx 80 Maxi-Lock 3,000 yd spools (1st pic & bought from Target).  For my smaller Gutermann Thread spools (110 yard) I use the Slimline Storage boxes (pictured below) that I bought from Joanne’s with a 50% coupon. I also have Gutermann Bustling thread and I keep them in a clear plastic shoebox sized bin. 
Of course there are the wooden thread spool holders that attach to the wall making threads easily accessible. I personally don’t care for them b/c the spools collect dust..and from my experience.. dust & sewing machines don’t mix. 
Other thread storage ideas: wood spool cabinet chests, stackable multi-size thread organizer bins, thread boxes, wooden spice racks, peg boards and stackable sterilite bins. I have also seen cool wall art created from wooden dowels holding spools of thread.

Here are some other great ideas for thread storage:


After all of your threads are organized and inventoried it’s now on to the bobbins. 
BOBBINS: 
We can’t forget about the bobbins.  I included a space on the thread inventory page to note if you have a matching bobbin or not.  

If you store your bobbins in a bobbin case (like I do), I designate a spot specifically for that color.  I use 1/2 x 3/4” self adhesive labels and write down the thread name & color #/name:
example: ML # 4465  Rad Turq. That way when that spool runs out I know that I don’t have that color available in a spool.  I know that the bobbin spot is reserved for Maxi-Lock #4465 Radiant Turquoise bobbin thread.


If you have a lil extra cash flow you can buy bobbin attachment pieces that easily attach the bobbin to the thread spool. Such as: Bobbin Mates or Handi Bobs.  I have tried the Bobbin Mates but w/out much luck, I don’t use standard size spools so the bobbin attachments don’t actually “attach” to the spools of thread.


For my unfilled bobbins, I keep them stored ina windowed square spice tin magnetically attached to a magnetic board.  If I do need to make a bobbin, I can glance over at the board to see if I have any available bobbins.

I use a magnetic board for the storage of everything!  I simply LOVE the spice tins for that purpose.  

Other great ideas for bobbin storage:


Bobbins attached to spools via a rubber band!


Pedicure Toe Separator's.. just clever! 


Or use standard ice cube trays! 


Monday, May 14, 2012

Fabric Organizing, Logging & Storage


Organize-A-Long:
Week #1 at a glance...
Category 1: * Cotton / Organic Cotton *
Cotton is the most popular fiber used worldwide. It can be smooth or textured, soft or durable, sheer or
satiny. The world of cotton fabrics is versatile and abundant.
Calico
Denim
Diaper Cloth
Dimity
Drill
Duck
Lighter duck
Eyelet
Flannel cotton
Flannelette
Gauze
Gingham
Lawn
Muslin
Organdy
Outing flannel
Oxford
Percale
Pima Cotton, from Egyptian
cotton,
Polished Cotton
Poplin
Sailcloth
Sateen
Seersucker
Swiss
Terry Cloth
Velveteen
Velour
Whipcord Cotton Fabric
Knit: Solids / Printed / Ribbed
Medium Weight Quilting Cotton
Waffle weave
Birdseye
Quilt Batting


Category #2: * Polyester *
Polyester is a strong and durable synthetic fabric. Polyester dries quickly and can be washable or
dry clean only, so check your tags. Polyester is often used as a blend with other fabrics to lend
wrinkle resistance. It is not the easiest fabric to remove stains from, and doesn't breathe as well as
other fabrics may.
BLazer Poplin
Charmeuse
Chiffon
Georgette
Lame’
Microfiber Fabrics
Minkie (Minky)
Moleskin
Organza
Peachskin
Poplin
Satin
Stretch Velvet
Taffeta
Velour

Category #3: * Wool *
Wool is the textile fibre obtained from sheep and certain other animals,[1] including cashmere from
goats, mohair from goats, qiviut from muskoxen, vicuña, alpaca, camel from animals in the camel
family, and angora from rabbits

Category #4: * Specialty Fabrics *
Diaper Making Fabs:

Cotton/Organic Cotton:
Fleece
Terry
Velour

Hemp:
Fleece
Terry
Velour

Bamboo
Fleece
Terry
Velour

PUL / DIY
SSM
CDMF
Zorb 1
Zorb 2

Hemp:
Corduroy
Muslin
________________________________
________________________________
Hempcel:
________________________________
________________________________
________________________________
IKAT:
________________________________
________________________________
________________________________
Soy:
________________________________
________________________________

Insul-Bright

Week #1 Break Down: Fabrics
For the swatch pages: you do NOT have to cut a piece of the fabric! You can choose to
either take a picture of it or find a pic off of the designers website and print it out!
Don’t forget to make multiple copies of your Fabric Swatch Inventory Page before you
get started!
Don’t be embarrassed, take a ‘BEFORE’ picture. Also, take pics throughout your organizing
journey, it will give you a sense of accomplishment when you are ready to give up.
Remember.. it feels like it gets worse before it gets better! Don’t give up! Stay focused and
look at the big picture.. Your Organized Fabric!
Before you can start taking inventory or logging your fabric I suggest seperating it into
categories. That way, when you return it to where you store it, it will already be broken down
into categories. ie: all quilting wovens in one section, all knits in another, specialty fabs,
etc. etc. If you store in bins/tubes/totes: mark the totes.
If you store your fabric in totes, tape a piece of paper of the type of fabric on the outside- on
the lid and the side out that you see once stored. I also recommend that if you store your
fabrics in totes, get clear/see through ones.. that is also a huge help!
Monday - Friday Week #1:
For Tube/Tote/ Bin Mamas: Locate all bins/tubes/totes of your fabric. If room permits,
begin to sort through them. If there are multiple styles of fabric stashed, divide them in piles
of type. Ie. woven, knit, poly, etc. etc. * If room does not permit for you to keep the piles of
seperated fabric out.. you can inventory your fabric via the swatch page and return fabric
back in bins divided in types. Take notes on which bins hold which types of fabrics that are
inside so you can refer back to them in the future to pull out for large divide and organize.
You can either # the totes or tape the information to it. There is also a NOTES section on the
swatch page you can enter the Tote # and location.
Fabric at Hand Mamas: If your fabrics are easily accessible: you can begin by seperating
your fabrics by types: cottons/ polys/ specialty etc. This is also a great time to decide
storage solutions. If your current storage works, then don’t change. Some may need new
storage solutions. I bought a wire cube shelving unit for the closet and it works great!
* ONCE all your fabrics are divided into categorized piles, start logging your inventory
then putting it away in their storage location. I began taking inventory of fabrics I had the
less of. -Specialty fabs: Hemps, Diaper & Pad Making fabrics etc).
* While organizing my quilting fabs I did 2 things: I divided them into Designer, then
broke it down into design lines and then color categories. It made finding the color
coodinates to that design a breeze. Of course you don’t have to do this, it’s just a thought.
OR you could just organize by color.
Continue the same process with the rest of the Fabrics via Category and Types until ALL of
your fabrics are swatched, logged and stored.
This may take you longer than a week and that’s okay! Just keep truckin at it!

Friday, May 11, 2012

AND....The Winner Is........ DRUMROLL PLEASE!

LEIGH!!

Congrats Mama!

Thank you all for your participation and for helping spread the word about TOSN!

Please keep your eyes peeled... something else awesome is in the works!


(winner was chosen according to the random.org generator)

Thursday, May 10, 2012

A New Chapter for TOSN!!!

For all - The Organized Sewer's Notebook purchasers, thanks to the suggestion of a few mamas, I have added a whole chapter and updated the Table of Contents page.

Please check your emails and spam folders!  Thanks!

Wednesday, May 9, 2012

Coming Soon!


I'm bursting at the seams! 


I have to share... 


Coming Soon.... 


The introduction of another great product to The Organized Notebook line.. 


Keep your eyes peeled!

Tuesday, May 8, 2012

It's a Give Away and a Good One!

I have decided to run another giveaway! YEY! I am super excited about this one!

Drawing is on Friday May 11th at 1 pm CST.

What if you own TOSN already?  That's ok.. b/c I will send one to a family member or friend of your choice and you get the rest of the prizes!

The Prizes:

* The Sewer's Organized Notebook (sent via email),
* 3" binder (or  (2) 1.5" binders.. your choice) whatever works best for you!
* a set of 8 folder divider tabs
* a set of cardstock paper (for swatch pages), white or colored your choice!
* 25 key fob hardware sets
AND
* 6 yards of cotton webbing (colors of your choice).

How do you enter?  3 Simple Ways:

(1) LIKE the LISD FB Page...

https://www.facebook.com/LetItShineDesign

(2) SHARE the Giveaway post on your wall...

Then COMMENT following this post to confirm.

Voila! You are automatically entered.

With every link back to LISD's etsy cart you post, it is considered (1) entry.  The more you post the link (FB, Pininterst, Tweet, Blogs or Forums) the more you enter!

How do you pin it from the Etsy Page?
It's easy.. go to the etsy item page.. scroll down .. on the right side under shop owner, there are FB, PinIt and Tweet buttons...  click on it and spread the word!

http://www.etsy.com/listing/99176761/the-organized-sewers-notebook


Thanks Mamas!

* TOSN will be emailed immediately upon confirmation of email address.
* Other items will be mailed out within 3 day via USPS upon confirmation of mailing address

Monday, May 7, 2012

Please Leave Feedback!

For those who have purchased The Organized Sewer's Notebook.. could you please leave appropriate feedback on my etsy cart?

Feedback is extremely helpful to a shop owner and any future buyers. As a buyer, I look at feedback b/c it gives me an idea of what kind of business and their practices I will be doing business with.

Thanks So Much!

Welcome to Let It Shine Design's New Space!

Welcome to Let It Shine Design's new lil space on the web.

This is where you get to relax, grab a cup of java and read about my newest creation in the making, promotions, discount codes, give aways and ramblings as the artisan behind LISD.

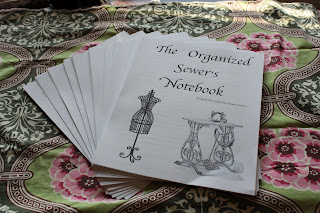
So... without further adieu.. I introduce The Organized Sewer's Notebook.  This lil beauty took me a great deal of time to create, but so well worth it.

I made a lil dedication area on my original draft which I did not include in the sale copy and I want to share it with you.. because w/o these wonderful people, TOSN might not have been created.


"I dedicate TOSN to my best friend, #1 supporter & wonderful husband Guillermo along with our 3 kiddos who had to endure my crazy creative spark, almost manic lightbulb moment thought processes, late dinners and lack of patience, my late nights to bed, books that weren’t read and lunches that were accidentally switched. You are all my inspiration, support and motivation to go that step above and beyond. I live you, I love you, I breathe you..... with all that I am.
Emilie, my mom, my best friend and teacher. She is the reason for my love of sewing, crafting, literature and the arts.The one who always encouraged me with quotes like..”you can do anything you want to do if you if make your mind up to it” and “hard work and determination pay off”. A patient teacher, a gentle yet firm disciplinairian and an exceptional role model. I love you Mom! "


Thanks for stopping by and make sure you check back soon.. I have a new project currently in the making!